


Fictional demo data.
Get started
Zhuzhfinance Lite is a cash flow planner and money journal for iOS and Android. It is a one-time purchase, with your financial data stored locally on your device.
Use it on its own or alongside your spreadsheet.
Start small. One account and a few plan items are enough for your first journal.
Portfolio: Set up accounts and assets
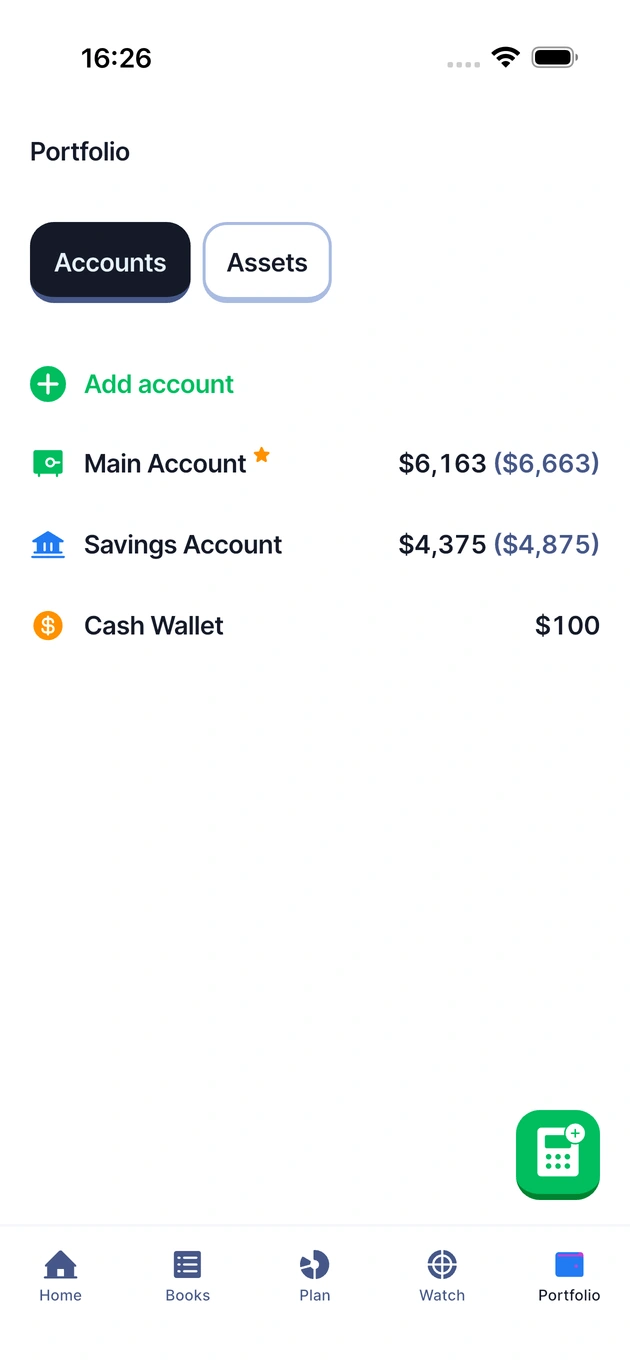
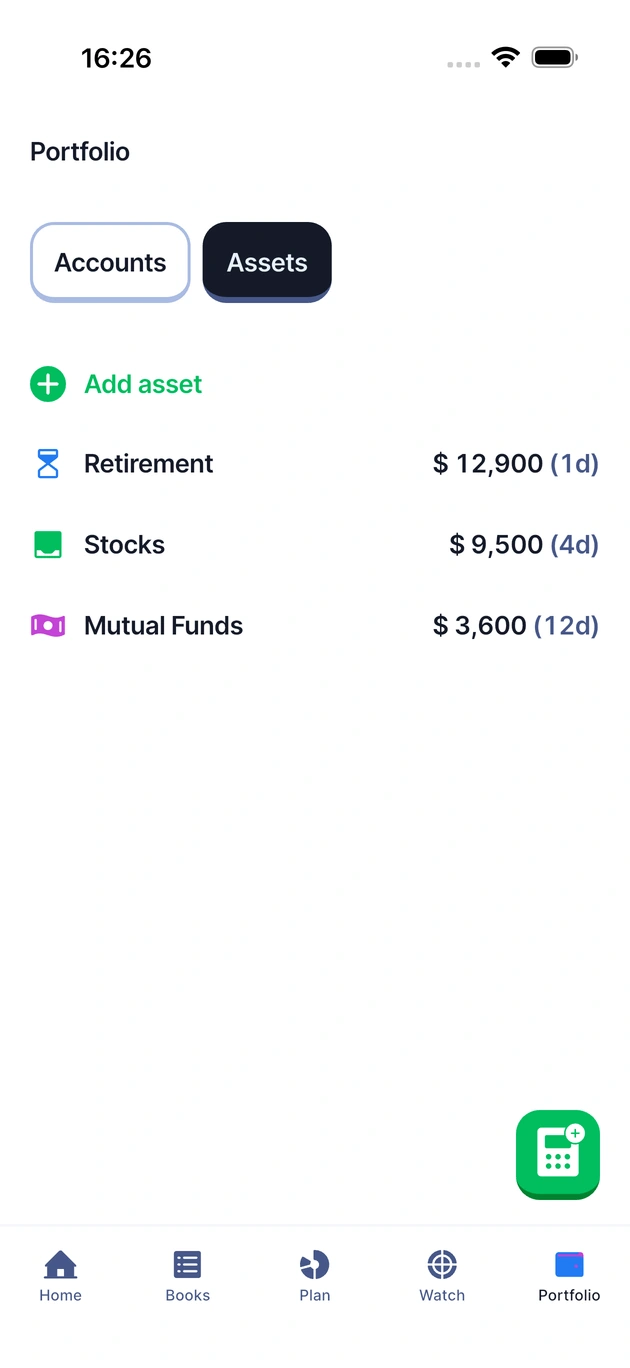
Accounts represent where you keep money, such as a current account, a savings account or a cash wallet. Assets represent things you own, such as investments.
Add an account
- Open Portfolio and select Accounts.
- Tap Add account and enter an Account name.
- Enter the Total balance you are starting with, then tap Add account.
Use the balance at the point you begin keeping this journal. An opening balance is your starting position, not new income to record again.
Read your account balances
When an account has money set aside in linked funds, its available balance appears first and its total balance appears in parentheses. In the demo, Main Account shows $6,163 available out of $6,663 total, with $500 set aside in funds.
Add an asset
- Select Assets, then tap Add asset.
- Enter an Asset name and its Current value.
- Add an optional Target investment and Target date, then tap Add asset.
Review your assets
Record an Investment when you put money into an asset. Use a Value entry when you update its current value without moving money.
Plan: Build your monthly plan
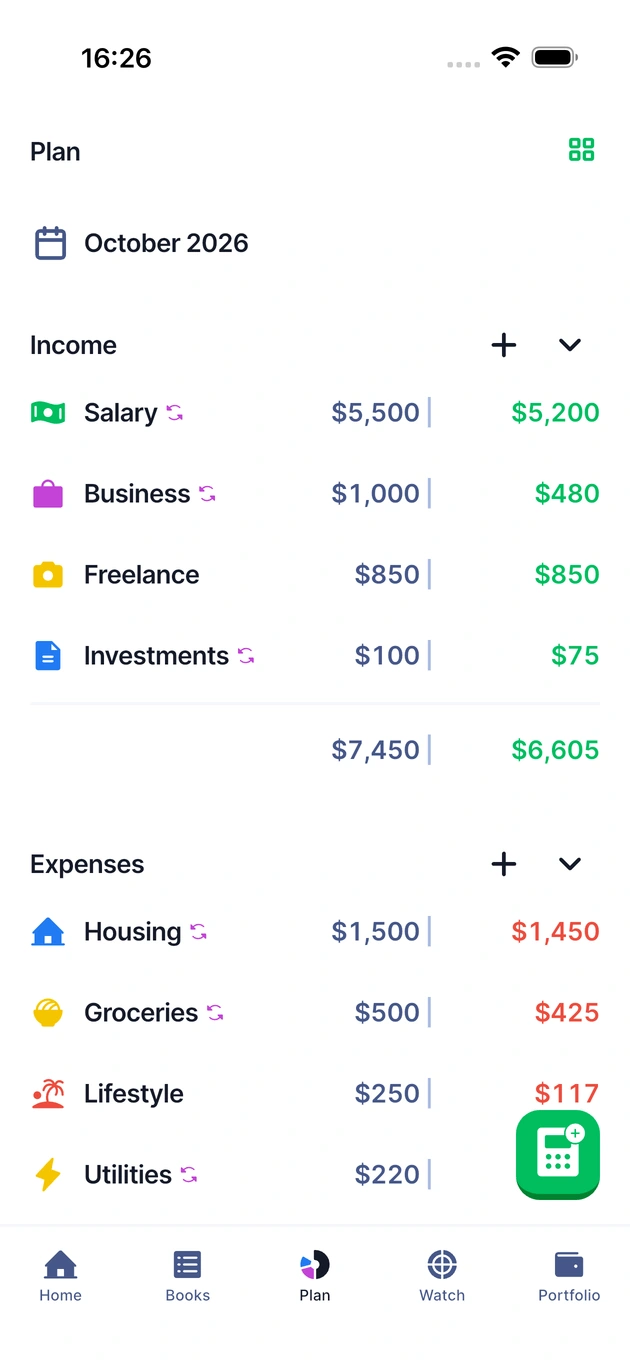
A plan is what you expect to receive or use during a month. It does not move money or create a transaction. Your actual amounts come from the entries you record.
- Open Plan and tap the month heading to choose the month you want to plan.
- Tap the plus beside a category, such as Income or Expense.
- Choose an existing item. For a new income item, tap Add income, enter a name, and save it.
- Enter the amount you expect, check the month, and save the plan amount.
- Repeat for expenses, savings, investments and debt payments.
To change an existing planned amount, tap its row or amount, enter the new value, and confirm with the green checkmark.
Planned and actual
The first amount in a Plan row is planned; the second is actual. These fictional examples match the screenshots:
| Item | Planned | Actual |
|---|---|---|
| Salary | $5,500 | $5,200 |
| Housing | $1,500 | $1,450 |
| Groceries | $500 | $425 |
Review the same month in both your plan and your transactions. If an actual amount is missing, check the transaction date and the item it was recorded against.
Books: Keep a money journal
Choose the right transaction type
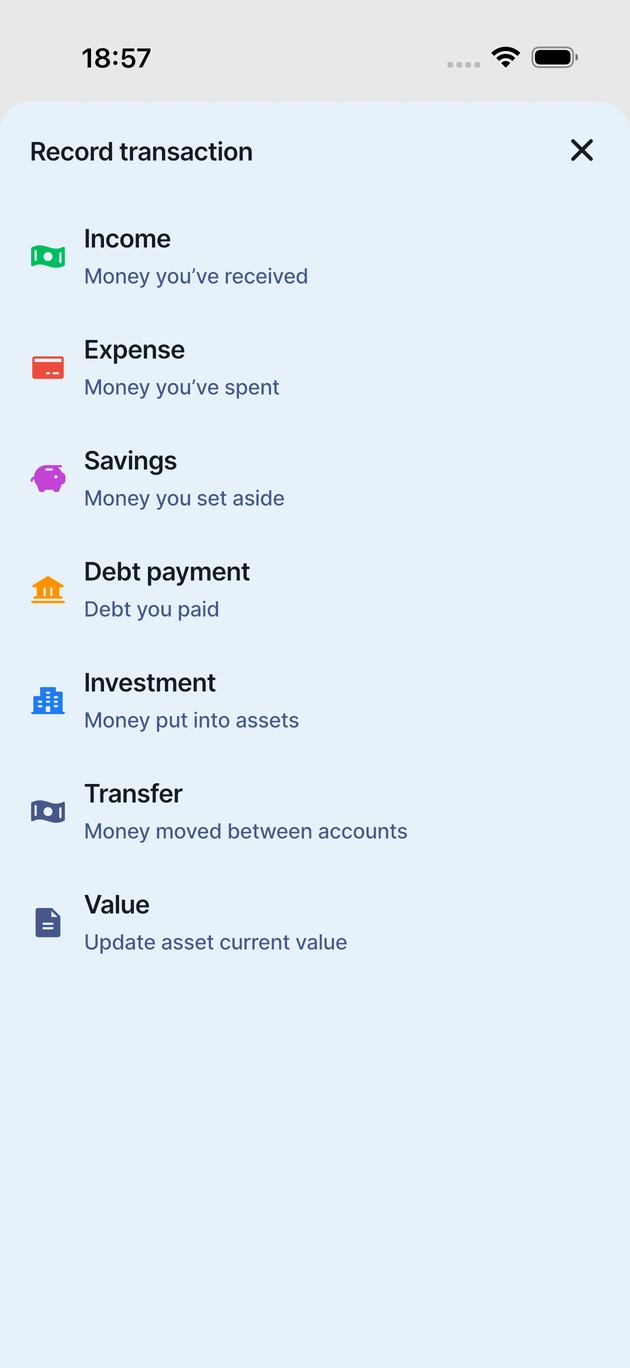
Books is your transaction history. Use the green calculator buttonto open Record transaction.
- Income: money you received, such as salary.
- Expense: money you spent, such as rent or groceries.
- Savings: money set aside in a fund linked to the account it is saved in.
- Debt payment: money paid from an account toward a debt.
- Investment: money put into an asset.
- Transfer: money moved between your accounts, rather than new income or an expense.
- Value: an update to an asset's current value, rather than a cash movement.
Record an expense
- Choose the transaction type, such as Expense for groceries.
- Choose the relevant item, enter a positive amount with the calculator, and confirm it with the green checkmark. The transaction type sets the direction.
- Choose the account and, where needed, the destination fund, debt, asset or account.
- Check the date, add an optional note, and tap the record button, such as Record expense, to save the entry.
Review an entry
Tap an entry in Books to review it. Use the date filter to change the period and the filter icon to narrow the list by transaction type or item. Check these filters if an entry seems to be missing.
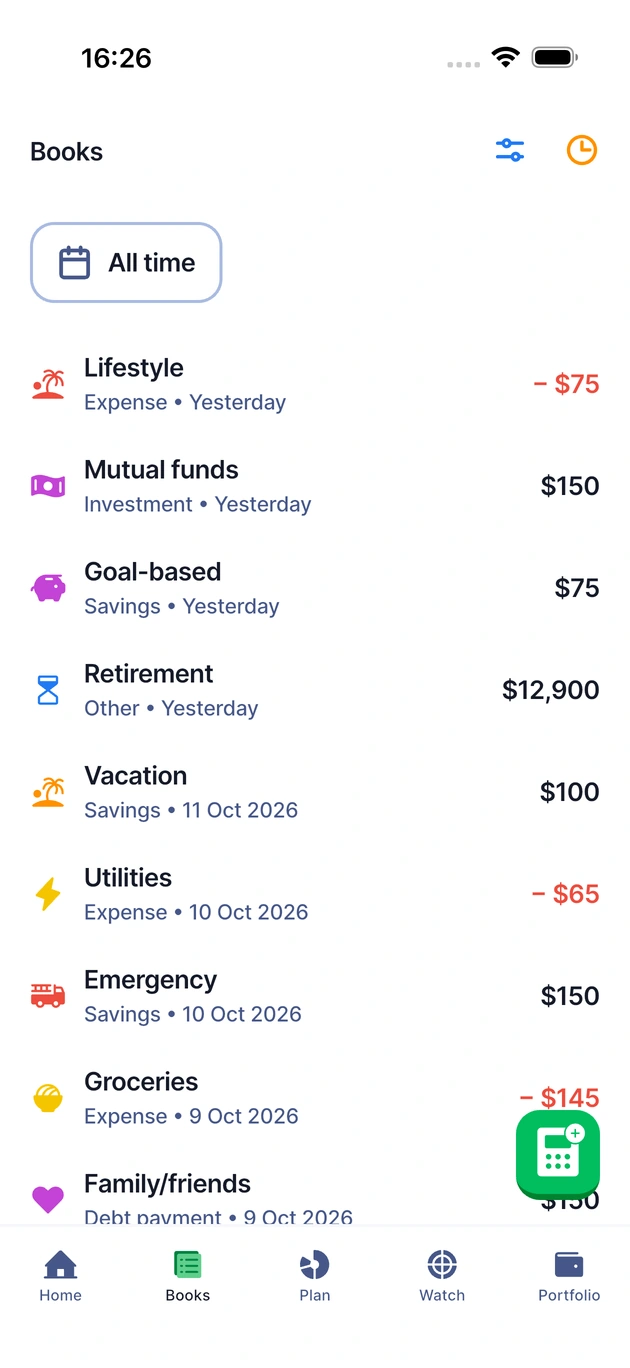
Bring your own way of organizing money. Your journal can support the system you already use.
Watch: Save toward goals
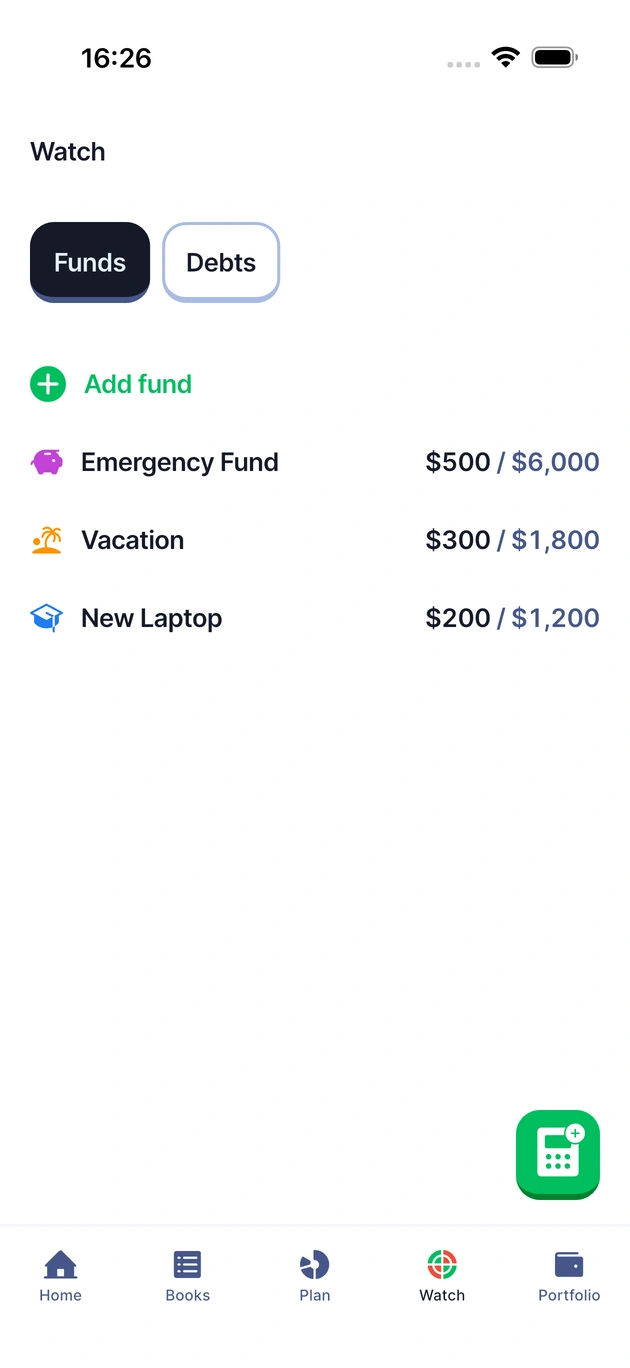
A fund gives money in an account a purpose, such as an emergency fund, a holiday or a new laptop.
- Open Watch, select Funds, and tap Add fund.
- Enter a Fund name and the Amount saved so far.
- Add an optional Target amount and Target date.
- Choose the account under Saved in, then tap Add fund.
Review your funds
The saved amount is money already inside that account, not extra money to add to its total balance. In the demo, Emergency Fund shows $500 saved toward a $6,000 target.
For a new contribution, record a Savings transaction and select the account and its linked fund. If money actually moves between your accounts, record that movement as a Transfer.
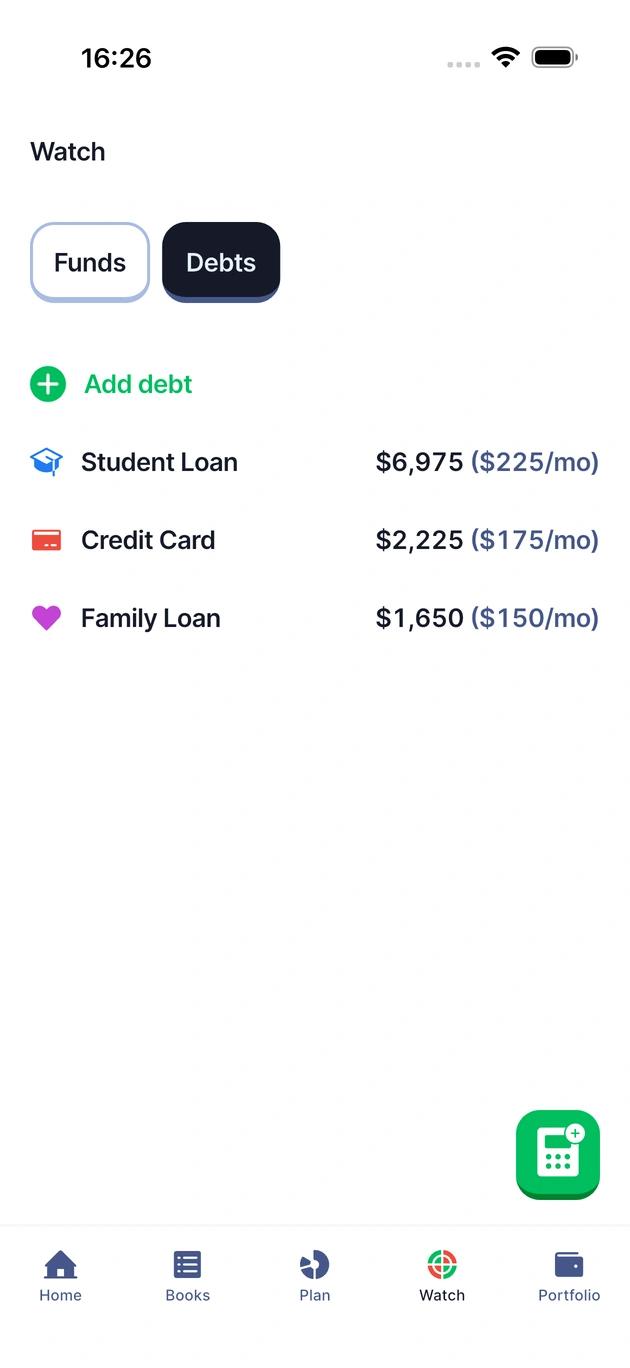
Watch: Track debts
- In Watch, select Debts and tap Add debt.
- Enter a Debt name and the Amount owed now.
- Add the optional original debt amount, monthly payment and annual interest if they apply.
- Tap Save debt.
Review repayments
Include the payment you expect to make in Plan. When you actually pay it, record a Debt payment from the account you paid with and select the debt. Planning a payment is not the same as recording one.
The demo Student Loan shows $6,975 owed and a $225 monthly payment. Use your own balances and payment details.
Home: Review your cash flow
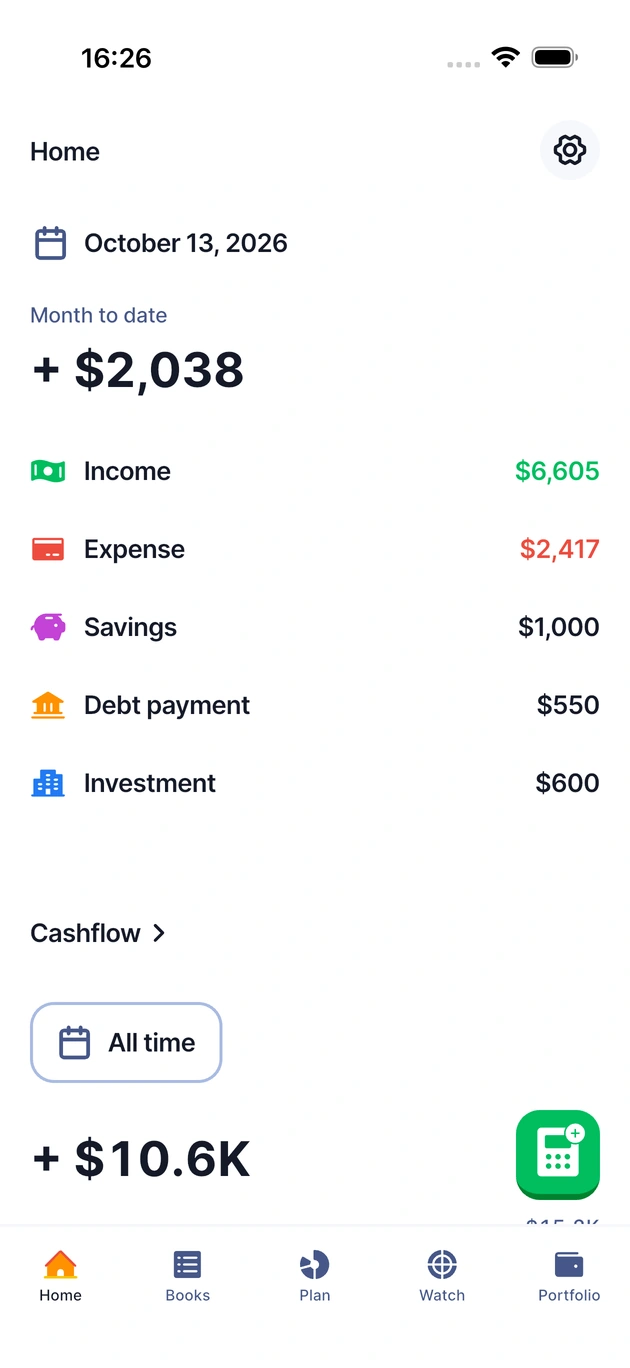
Home brings your recorded income, expenses, savings, debt payments and investments together. The month-to-date balance is income minus those outflows.
- Check the month-to-date totals to see what you have recorded so far.
- Open Cashflow and use its date filter to review another period.
- Compare the same period in Plan to see how actual amounts line up with your expectations.
- Review your accounts, assets and debts alongside the net worth report.
In the demo, $6,605 of income minus $2,417 in expenses, $1,000 in savings, $550 in debt payments and $600 in investments leaves a $2,038 month-to-date balance. This is different from the total money in your accounts.
Local data and backups
Keep a backup
Lite stores your journal locally on your device and does not automatically sync your journal between devices that are not using the same iCloud account.
- Open Settings, then select Data.
- Use Back up now to create a backup, or enable Auto backup for monthly backups.
- When Download backup is available, keep a copy outside the app.
Keep a backup before deleting your journal, uninstalling Lite or changing devices. Delete data is a removal action, not a way to start a new month.
To get a spreadsheet copy, select your journal's name in Settings, then choose Export Journal. The journal export and backup guide covers choosing months, saving the exported workbook and keeping a separate backup file.